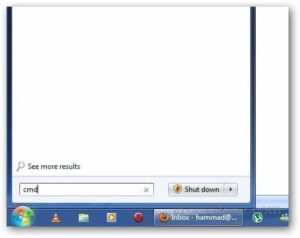
Click the Start Menu and type: cmd and hit Enter.
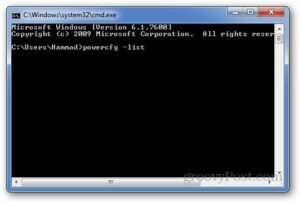
In the Command Prompt type the following command:
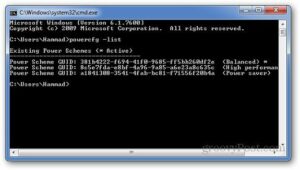
powercfg –list
It will show you the three power plans with their GUID numbers. Copy the GUID number of the power plans as they will used to create the shortcut.
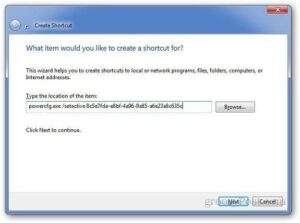
Now, right click on desktop and go to New >> Shortcut.

In the location field, type: powercfg.exe /setactive GUIDNumber and click Next. The GUID number is the number copied earlier.
Here are the GUID numbers for 3 different power plans. Paste the following for specific power plan shortcuts.
Balanced
powercfg.exe /setactive 381b4222-f694-41f0-9685-ff5bb260df2e
High Performance
powercfg.exe /setactive 8c5e7fda-e8bf-4a96-9a85-a6e23a8c635c
Power Saver
powercfg.exe /setactive a1841308-3541-4fab-bc81-f71556f20b4a
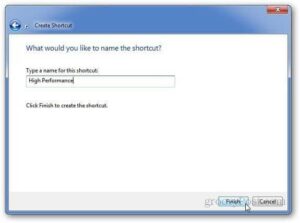
Type the name of the shortcut and click Finish.
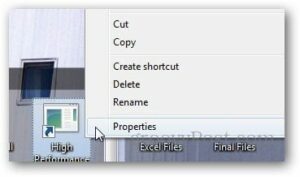
Now, go to your desktop, right click on the newly created shortcut and go to its Properties.
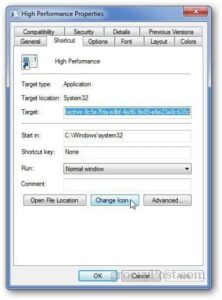
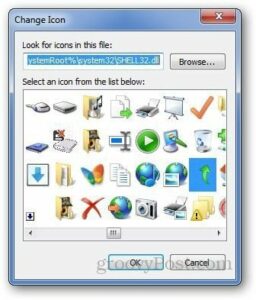
Click on Change Icon from Shortcut tab.
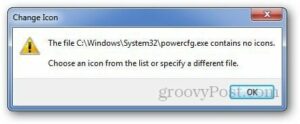
Do note that it will show you an error that the specific path contains no icons. Just click Ok.
It will open the change icon window. You can select any icon from the preloaded icons or you can browse you computer if you have any custom icon. Or you can use a custom icon too.
Now, whenever you want to change your power plan, just double click the shortcut icon and you are good to go.